

Introduction and Quick Summary
Welcome to the ultimate dessert experience with our irresistible Chocolate Cherry Cookies! These delightful treats marry the rich flavors of dark chocolate and the tart sweetness of cherries, creating a delectable cookie that will have your taste buds dancing. Perfect for family gatherings or a cozy night in, this recipe is not only easy to make but also offers an impressive result that will wow your guests.
Imagine biting into a warm cookie where soft chocolate meets juicy cherries—pure bliss! The best part? You can whip these up in no time. With simple ingredients and straightforward steps, you’ll be enjoying these mouthwatering cookies in less than an hour. Whether you’re a seasoned baker or just starting out, this recipe is designed for everyone. Plus, we’ll share tips on how to store them so that you can enjoy these treats for days.
Get ready to elevate your baking game with our Chocolate Cherry Cookies. In this article, we’ll cover everything from the main ingredients to the step-by-step preparation guide. So grab your apron and let’s get started on creating a batch of these scrumptious cookies!
Main Ingredients
Flour
Flour serves as the foundation of our Chocolate Cherry Cookies. For this recipe, you will need 2 cups of all-purpose flour. This ingredient gives structure to the cookies while allowing them to remain soft and chewy. When measuring flour, it’s important to spoon it into your measuring cup and level it off with a knife for accuracy.
Cocoa Powder
To achieve that rich chocolate flavor, you will need 1/2 cup of unsweetened cocoa powder. This ingredient not only adds depth but also contributes to the beautiful dark color of the cookies. Make sure to sift the cocoa powder before adding it to avoid any lumps that could affect the texture of your dough.
Sugar
You will require 1 cup of granulated sugar and 1/2 cup of packed brown sugar for sweetness. The combination of these sugars enhances the overall flavor profile while helping create that desired chewy texture. The brown sugar adds moisture thanks to its molasses content, making each bite even more delightful.
Butter
Using 1 cup (two sticks) of unsalted butter is essential for richness and flavor. Make sure the butter is softened at room temperature; this helps in creaming it effectively with the sugars. Softened butter creates air pockets in the dough which leads to a lighter cookie texture.
Eggs
Two large eggs are needed for binding all ingredients together while adding moisture. Eggs also help in achieving that lovely soft texture characteristic of great cookies. Ensure they are at room temperature as well; this allows them to incorporate seamlessly into the mixture.
Cherries
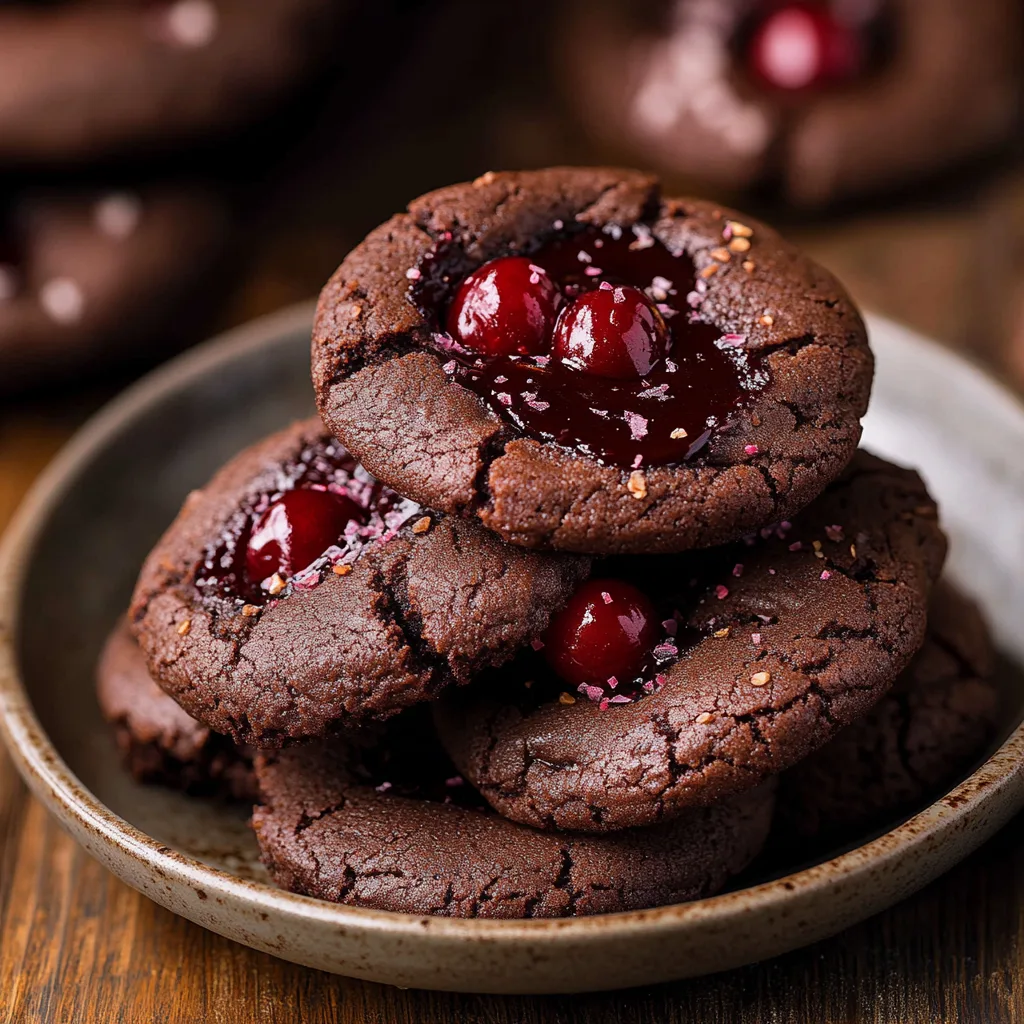
For this recipe, use 1 cup of fresh or frozen pitted cherries—chopped coarsely if using larger varieties. Cherries add a burst of sweetness and tartness that beautifully complements the rich chocolate flavor. If using frozen cherries, thaw them completely and drain excess liquid before adding them to your dough.
Chocolate Chips
Adding 1 cup of semi-sweet or dark chocolate chips enhances the chocolaty goodness of these cookies! You can mix it up by using milk chocolate chips or even white chocolate chips if you prefer a different taste experience.

How to Prepare Chocolate Cherry Cookies
Step 1: Preheat Your Oven
Before diving into mixing ingredients, preheat your oven to 350°F (175°C). Preheating ensures that your cookies bake evenly from start to finish. It’s always best practice when baking as it allows leavening agents like baking soda or powder (if included) to activate properly right from the get-go.
Step 2: Cream Together Butter and Sugars
In a large mixing bowl, add your softened unsalted butter along with both types of sugar—granulated and brown sugar—and beat them together until light and fluffy (about 3-5 minutes). This process incorporates air into your mixture which results in lighter baked goods; don’t rush this step! Use an electric mixer on medium speed or whisk vigorously if doing it by hand until fully combined.
Step 3: Add Eggs
Once your butter-sugar mixture looks fluffy, crack in two large eggs one at a time while continuing to mix on low speed after each addition until fully incorporated into the batter. Scrape down sides if necessary during mixing ensuring everything is combined well without any streaks remaining visible.
Step 4: Combine Dry Ingredients
In another bowl, whisk together your all-purpose flour and unsweetened cocoa powder until evenly mixed; this helps prevent clumping when added later on! If desired add baking soda (if using) alongside salt which balances flavors perfectly too! Gradually incorporate this dry mix into wet ingredients using low speed so as not over-mix; stop once just combined!
Step 5: Fold In Cherries & Chocolate Chips
Gently fold in those yummy chopped cherries along with semi-sweet or dark chocolate chips using a spatula until evenly distributed throughout cookie dough—you want every bite filled with deliciousness! Avoid overworking here as well since too much mixing can lead tough-textured cookies instead!
Step 6: Scoop & Bake
Using either two spoons or an ice cream scoop portion out dollops onto lined baking sheets leaving ample space between each scoop allowing room for spreading during bake time! Aim for about tablespoon-sized portions spaced evenly apart across trays then pop them into preheated oven setting timer between 10-12 minutes depending upon desired chewiness level—less time means chewier while longer yields crispier edges!

Serving and Storing Tips
Serving Suggestions
These delightful Chocolate Cherry Cookies can be served warm straight from oven paired nicely alongside cold glass milk or hot coffee depending upon preference! You might also consider serving them at parties arranged neatly on platters garnished with fresh cherries atop each cookie giving visual appeal plus enticing aroma filling air around guests surely making mouths water instantly!
Consider pairing these treats with ice cream sundaes where broken pieces are added atop scoops vanilla—creating heavenly dessert combo sure impress anyone digging into it! Experimenting slightly by drizzling melted white/milk chocolates over cooled batches adds extra flair presentation wise too!
Storing Guidelines
To keep your freshly baked Chocolate Cherry Cookies at their best quality longer store them in airtight containers placing parchment paper between layers preventing sticking together during storage period recommended storing within room temperature conditions lasting up-to one week easily without losing shape/taste freshness!
For extended shelf-life freeze leftover portions after cooling completely wrapping tightly plastic wrap/freezer bags—they can last several months frozen maintaining flavors intact perfectly thawing overnight refrigerator when craving strikes again later down line!
By following these tips you ensure maximum enjoyment out every batch baked allowing savoring delightful moments created through delicious homemade goodies shared loved ones alike throughout seasons ahead!
Mistakes to Avoid
One common mistake when baking Chocolate Cherry Cookies is using stale ingredients. Fresh ingredients, especially chocolate and cherries, significantly impact the flavor and texture of your cookies. Always check the expiration dates on your baking staples. When chocolate is fresh, it melts beautifully. Stale chocolate can lead to a bland taste and undesirable consistency.
Another mistake people often make is overcrowding the baking sheet. Placing too many cookies on one tray can result in uneven baking. Cookies need space to spread. Aim for about two inches between each cookie dough ball on the sheet. This allows for proper airflow, ensuring that each cookie bakes evenly and achieves that perfect golden-brown exterior.
Overmixing the dough is another pitfall to avoid when making Chocolate Cherry Cookies. While mixing is essential to combine ingredients, overmixing can develop gluten in the flour, yielding tough cookies instead of soft ones. Mix until just combined to maintain a tender texture. Remember, a little flour speck here and there is okay!
Failing to chill the dough before baking can also lead to disappointing results. Chilling solidifies the butter in the dough, preventing excessive spreading during baking. If you skip this step, you’ll end up with flat cookies rather than thick and chewy ones. Ideally, refrigerate your cookie dough for at least 30 minutes before scooping onto the baking tray.
Lastly, don’t forget to rotate your baking sheets halfway through the baking process. Ovens often have hot spots that can cause uneven cooking. By turning your trays around during baking, you ensure every cookie receives equal heat exposure, promoting uniform browning and texture.
Tips and Tricks
To achieve the best Chocolate Cherry Cookies, consider using high-quality chocolate chips or chunks. The type of chocolate you choose directly affects the taste of your cookies; premium chocolate offers richer flavor profiles compared to standard brands. Dark chocolate pairs perfectly with cherries’ tartness, creating a delightful contrast that enhances every bite.
Pay attention to measuring your ingredients accurately as well. Baking is a science; even slight deviations can change your cookie’s outcome. Use a kitchen scale for precision or measuring cups designed for dry ingredients to ensure accurate amounts of flour and sugar are used.
Incorporating chopped nuts like walnuts or pecans can elevate your Chocolate Cherry Cookies further. Nuts add texture and depth of flavor that complements both chocolate and cherries nicely. Toasting nuts beforehand brings out their natural oils and intensifies their flavor even more.
Consider experimenting with different types of cherries too! While fresh cherries are delightful, dried cherries offer convenience and intense sweetness without excess moisture affecting cookie consistency. You could also try maraschino cherries for a fun twist.
Finally, pay attention to cooling times after baking your cookies. Allow them to cool on the baking sheet for about 10 minutes before transferring them to wire racks for complete cooling. This extra time helps cookies set properly while still warm, ensuring they remain soft and chewy inside.
Suggestions for Chocolate Cherry Cookies
When making Chocolate Cherry Cookies, opt for room temperature butter instead of cold butter straight from the fridge. Room temperature butter creams well with sugars and creates an airy texture in cookies once baked. This simple adjustment ensures that your cookies come out soft rather than dense.
Using parchment paper or silicone mats on your baking sheets can prevent sticking and promote even cooking as well. These materials create a non-stick surface that makes clean-up easier while allowing heat distribution for optimal cookie performance.
Consider adding a pinch of sea salt right before serving these delicious treats! A sprinkle enhances sweetness while balancing flavors beautifully—creating an ideal contrast that brings out every ingredient’s best notes.
If you love unique flavors, try adding spices like cinnamon or vanilla extract into your dough mixture! A bit of warmth from spices enhances overall taste profiles without overpowering cherry or chocolate flavors—making each bite more exciting!
Lastly, store leftover Chocolate Cherry Cookies properly by placing them in an airtight container at room temperature or freezing them if you want longevity! Proper storage keeps them fresh longer—ensuring enjoyment beyond just one sitting!

FAQs
What makes Chocolate Cherry Cookies special?
Chocolate Cherry Cookies stand out because they marry two favorite flavors: rich chocolate and tart cherries. This combination creates a balanced dessert that appeals to various palates—offering sweetness from chocolate alongside refreshing tartness from cherries.
Can I use frozen cherries instead of fresh?
Yes! Frozen cherries work well in Chocolate Cherry Cookies but should be fully thawed first before adding them into your dough mixture! Drain any excess moisture after thawing so it won’t affect cookie consistency during baking.
How do I know when my cookies are done?
Look for slightly golden edges while keeping centers soft when checking doneness for Chocolate Cherry Cookies! They’ll continue cooking slightly after being pulled from heat due to residual heat—this ensures softness remains intact!
Can I replace all-purpose flour with gluten-free options?
Absolutely! You can substitute all-purpose flour with gluten-free blends specifically formulated for baking; however, results may vary based on brand chosen! Testing different mixes will help determine which works best without compromising texture.
How long do Chocolate Cherry Cookies stay fresh?
When stored correctly in an airtight container at room temperature, these cookies typically stay fresh for up to five days! For longer preservation periods beyond this time frame—consider freezing them!
Can I add other types of chocolate?
Yes! Feel free to mix different types of chocolate chips into your cookie batter: semisweet morsels paired with dark or white chocolates create delightful surprises throughout every bite—enhancing flavor while altering visual appeal as well!
Conclusion
Baking perfect Chocolate Cherry Cookies requires attention to detail and understanding key techniques to avoid pitfalls along the way! Use fresh ingredients like premium chocolates paired harmoniously with tart cherries while ensuring accuracy in measurements creates delightful results every time!
Remember not overcrowding pans allows adequate air circulation—aiding even cooking throughout each batch—while chilling dough prevents unwanted spreading during bake time! Incorporate fun elements like nuts or spices elevates flavor profiles further creating unique twists everyone will enjoy!
Follow proper storage methods prolongs enjoyment beyond initial batches; whether sharing treats at gatherings or indulging solo after dinner—the thrill lies within discovering how versatile these delicious delights truly are! Enjoy creating memorable moments around these delightful bites together with family & friends today!


